The Ultimate Chimney Flashing Repair Guide (2024 Update)
Posted: June 6, 2024
Maintaining your home often feels like a never-ending task, but some repairs – like chimney flashing – are critical to protecting your home’s structure and your family’s safety. In this ultimate guide to chimney flashing repair, we’ll cover everything you need to know to keep your home secure and leak-free, including:
- Understanding Chimney Flashing
- Common Signs of Chimney Flashing Damage
- The Importance of Timely Repairs
- 6-Step Guide to Repairing Chimney Flashing
- When to Call a Professional
- Preventative Maintenance Tips
🤔 Understanding Chimney Flashing
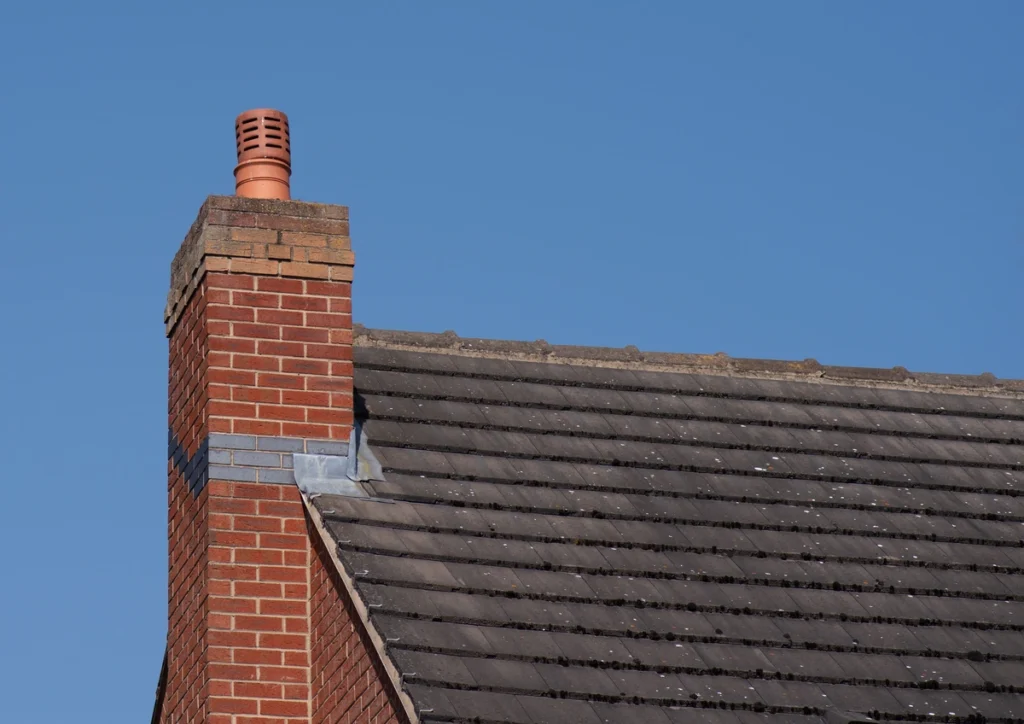
Chimney flashing is a critical component of your roof system. It’s designed to create a waterproof barrier between your chimney and your roof. Without proper flashing, water can seep into your home, causing not just unsightly stains but also structural damage.
Flashing is typically made from aluminum, steel, or copper. These materials are durable and can withstand harsh weather conditions. However, over time, flashing can deteriorate due to exposure to the elements or poor installation.
Understanding the importance of chimney flashing helps you appreciate why keeping it in good condition is essential for your home’s health.
⚠️ Common Signs of Chimney Flashing Damage
Spotting damage early can save you a lot of headaches and money. Here are some common signs that your chimney flashing may need repair:
- Water Stains on Ceilings or Walls: If you notice water stains on your ceilings or walls near the chimney, it’s a significant indication that your flashing might be compromised.
- Visible Rust or Corrosion: Rust and corrosion are clear signs that your flashing needs attention. Metals like aluminum and steel are susceptible to these issues over time.
- Loose or Missing Flashing: If you observe that the flashing around your chimney has become loose or sections are missing, it’s time to take action.
Recognizing these signs early can help prevent more extensive damage and costly repairs.
⏱️ The Importance of Timely Repairs
Timely repairs can make all the difference between a small fix and a major renovation. Here’s why you should act quickly:
- Prevent Structural Damage: Water intrusion can compromise the structural integrity of your home. Over time, this can lead to rot and even mold growth, putting your family’s health at risk.
- Save Money: Early intervention can save you money in the long run by avoiding extensive damage and more costly repairs.
- Maintain Home Value: A well-maintained home retains its value better than one that has glaring issues. Ensuring your chimney flashing is in good condition helps maintain your property’s worth.
By addressing issues as soon as they arise, you protect both your home and your wallet.
Tools and Materials You’ll Need
Before you start any repair work, gather the necessary tools and materials:
- Ladder
- Flashing material (aluminum, steel, or copper)
- Roofing cement or sealant
- Pry bar
- Hammer and nails
- Wire brush
- Galvanized screws
- Caulking gun
- Measuring tape
Having the right tools and materials on hand will make the repair process smoother and more efficient.
🛠️ 6-Step Guide to Repairing Chimney Flashing
Repairing chimney flashing is essential to prevent leaks and maintain the integrity of your roof. Follow this 6-step guide to efficiently address any issues and ensure your chimney remains in top condition.
1. Inspect the Chimney Flashing
Carefully inspect the flashing for any signs of damage. Look for loose, corroded, or missing pieces. Use a wire brush to clean the area around the flashing to get a clear view of the damage. Pay close attention to any rust spots, cracks, or gaps that could potentially let water in. Inspect both the top and base of the chimney to ensure you don’t miss any problem areas. Taking your time during this step will help you identify all the issues that need to be addressed.
2. Remove Damaged Flashing
Using a pry bar, carefully remove any damaged sections of the existing flashing. Be cautious not to damage the surrounding shingles or roofing material. Start at one end and gently lift the flashing, taking care to pull out any nails or screws that are holding it in place. If the flashing is stuck, you may need to use a utility knife to cut through any adhesive or sealant. Removing all the damaged flashing ensures a clean slate for installing new materials.
3. Cut New Flashing Pieces
Measure the areas where you need new flashing. Cut the new pieces to size using tin snips. Ensure the new pieces overlap the old ones by at least two inches to create a secure barrier. Double-check your measurements before cutting to avoid wasting materials. It’s often helpful to cut a few extra pieces just in case you need them. The new flashing should be made of high-quality, weather-resistant material to ensure long-lasting protection.
4. Install the New Flashing
Secure the new flashing pieces with galvanized screws. Apply roofing cement or sealant to the edges to ensure a watertight seal. Start from the bottom and work your way up, overlapping each piece to direct water flow away from the chimney. Ensure that each piece is firmly attached and that there are no gaps where water could seep through. The application of roofing cement or sealant is crucial for preventing leaks and adding an additional layer of protection.
5. Secure the Flashing
Use a hammer and nails to secure the flashing firmly in place. Make sure there are no gaps where water could seep through. Check all the edges and seams to ensure they are tightly sealed. If necessary, add extra nails to reinforce the flashing, especially in areas prone to high winds or heavy rainfall. Properly securing the flashing will help it withstand various weather conditions and extend its lifespan.
6. Apply Sealant
Apply a generous amount of roofing cement or sealant around the edges of the flashing. This will provide an extra layer of protection against water intrusion. Use a caulking gun for a precise application and make sure to cover all seams and joints thoroughly. Allow the sealant to dry according to the manufacturer’s instructions before testing for leaks. This final step is critical for ensuring that your chimney is fully protected from water damage.
👨🔧 When to Call a Professional
While DIY repairs can be effective for minor issues, there are times when calling a professional is the best course of action. Consider hiring a professional if:
- The Damage is Extensive: If the damage extends beyond the flashing and affects the chimney structure or roofing material, it’s best to consult a professional to replace chimney flashing materials.
- You’re Not Comfortable with Heights: Working on a roof can be dangerous. If you’re not comfortable with heights or lack the necessary experience, it’s safer to hire an expert.
- You Want a Long-Term Solution: Professional roofers have the expertise to provide a long-term solution, ensuring your chimney flashing replacement is installed correctly and will last for years.
Knowing when to call a professional can save you time, stress, and ensure the job is done right.
💡 Preventative Maintenance Tips
Preventative maintenance can help extend the life of your chimney flashing and prevent future issues. Here are some tips:
- Regular Inspections: Conduct regular inspections of your chimney flashing, especially after severe weather. Spotting issues early can prevent them from worsening.
- Clean the Gutters: Keep your gutters clean and free of debris. Clogged gutters can cause water to back up and affect the flashing around your chimney.
- Trim Overhanging Branches: Overhanging branches can drop leaves and debris onto your roof, leading to moisture buildup. Trim back any branches that hang over your roof to reduce this risk.
By following these maintenance tips, you can keep your chimney flashing in good condition and avoid costly repairs.
🙌 Choose Shingle and Metal Roofs for Your Roofing Needs
At Shingle and Metal Roofs, we understand the importance of maintaining your home’s integrity. Our team of experienced professionals is dedicated to providing top-notch service and quality workmanship. Here’s why you should trust us with your roofing needs:
With years of experience in the roofing industry, our team has the knowledge and skills to handle any roofing project, big or small. We use only the highest quality materials to ensure your roof stands the test of time. Our commitment to quality means you get a durable and reliable roofing solution. Your satisfaction is our top priority. We work closely with you to understand your needs and provide tailored solutions that meet your expectations.
Ready to protect your home with top-tier chimney flashing repair? Contact us today to schedule a consultation and get started on your roofing project. Protecting your home from the elements starts with a well-maintained roof. By understanding the importance of chimney flashing and taking proactive steps to repair and maintain it, you can ensure your home remains safe and secure. If you’re ready to take the next step, our team at Shingle and Metal Roofs is here to help. Reach out today and let’s keep your home in top shape together.