Attic Insulation Removal Process Explained in 7 Steps
Posted: June 20, 2024
Have you noticed that your energy bills are higher than expected? Or perhaps you’ve experienced uneven temperatures throughout your home? The culprit might just be your attic insulation. Removing old or damaged insulation can significantly improve your home’s energy efficiency and overall comfort.
In this comprehensive guide, we’ll walk you through the entire process of attic insulation removal, from identifying the need for removal to understanding the benefits and steps involved. Whether you’re a DIY enthusiast or considering hiring professionals, this post has got you covered. Here’s what you can expect:
- Why Remove Old Attic Insulation?
- Signs It’s Time to Remove Your Insulation
- Benefits of Removing Attic Insulation
- Types of Attic Insulation
- Preparing Your Attic for Insulation Removal
- 7-Step Attic Insulation Removal Process
- Disposing of Old Insulation
- Addressing Common Issues During Removal
- When to Hire Professionals
- Preventing Future Insulation Issues
🤔 Why Remove Old Attic Insulation?
Removing old attic insulation is more important than you might think. Over time, insulation can deteriorate, become contaminated, or simply lose its effectiveness. Here are some compelling reasons to consider removing your old attic insulation:
First, old insulation can harbor mold, mildew, and pests. This can pose serious health risks to you and your family. Additionally, worn-out insulation may not provide adequate thermal resistance, leading to higher energy bills and uncomfortable living conditions.
Furthermore, upgrading your insulation can be an excellent investment. Modern insulation materials are more efficient and environmentally friendly, helping you save money and reduce your carbon footprint over time.
⚠️ Signs It’s Time to Remove Your Insulation
Not sure if you need to remove your attic insulation? Look out for these telltale signs:
- Inconsistent Temperatures: If different rooms in your house have noticeably different temperatures, your insulation might not be doing its job properly.
- High Energy Bills: A sudden spike in your energy bills could indicate that your insulation is no longer effective.
- Visible Damage or Moisture: Any signs of water damage, mold, or pest infestation are clear indicators that your insulation needs to be replaced.
By identifying these signs early, you can address insulation issues before they lead to more significant problems.
✅ Benefits of Removing Attic Insulation
Removing old attic insulation offers several benefits, including:
- Improved Energy Efficiency: New insulation can significantly reduce your heating and cooling costs by maintaining a consistent temperature.
- Enhanced Comfort: Proper insulation ensures that your home remains comfortable year-round, regardless of the weather outside.
- Healthier Living Environment: Removing contaminated insulation eliminates mold, mildew, and pests, creating a healthier indoor environment for your family.
These benefits make the process of removing and replacing insulation well worth the effort.
👇 Types of Attic Insulation
Before you begin the removal process, it’s essential to understand the types of insulation you might encounter. Common types include:
- Fiberglass: This is one of the most common types of insulation. It comes in batts or loose-fill form and is known for its affordability and effectiveness.
- Cellulose: Made from recycled paper products, cellulose insulation is environmentally friendly and offers excellent thermal performance.
- Spray Foam: This type of insulation is sprayed into place and expands to fill gaps, providing superior air sealing and insulation properties.
Knowing the type of insulation in your attic will help you prepare for its removal and choose the best replacement material.
🧰 Preparing Your Attic for Insulation Removal
Preparation is key to a successful insulation removal project. Follow these steps to get your attic ready:
- Clear the Area: Remove any storage items or personal belongings from the attic to create a clean workspace.
- Inspect for Hazards: Check for electrical wires, nails, or structural issues that could pose a danger during removal.
- Seal Off the Area: Use plastic sheeting to seal off the attic entrance and any vents to prevent insulation particles from spreading to other parts of your home.
Proper preparation minimizes risks and makes the removal process more efficient.
👷♂️ 7-Step Attic Insulation Removal Process

Removing attic insulation can be a straightforward task if done correctly. Follow these seven steps for a successful removal process:
1. Gather Your Tools and Safety Gear
Ensure you have all the necessary tools and safety gear ready before you start. Essential tools include a utility knife, heavy-duty trash bags, a vacuum cleaner with a HEPA filter, and a flashlight. Safety gear should consist of:
- Protective Clothing: Wear long sleeves, pants, gloves, and a hat to protect your skin from irritation.
- Respirator Mask: A high-quality respirator mask is crucial to avoid inhaling harmful fibers or contaminants.
- Safety Goggles: Protect your eyes from dust and debris.
- Utility Knife and Vacuum: For cutting and cleaning up insulation materials efficiently.
- Trash Bags and Containers: For collecting and disposing of old insulation.
2. Inspect the Insulation
Identify the type and condition of the existing insulation. Look for signs of damage, mold, or pests. This step is crucial as it helps you determine the safest and most effective method for removal. If you find mold or pests, you may need to address these issues before proceeding to prevent health hazards.
3. Start at the Far End of the Attic
Begin removing insulation from the farthest corner of the attic, working your way back towards the entrance. This method ensures that you don’t track debris through areas you’ve already cleaned. It also helps maintain a systematic approach, making the process more organized and efficient.
4. Use a Utility Knife for Batts
If you have fiberglass batt insulation, use a utility knife to cut it into manageable sections before removing it. Cutting the batts into smaller pieces makes them easier to handle and prevents the fibers from becoming airborne. Carefully place each section into a trash bag to reduce mess and exposure.
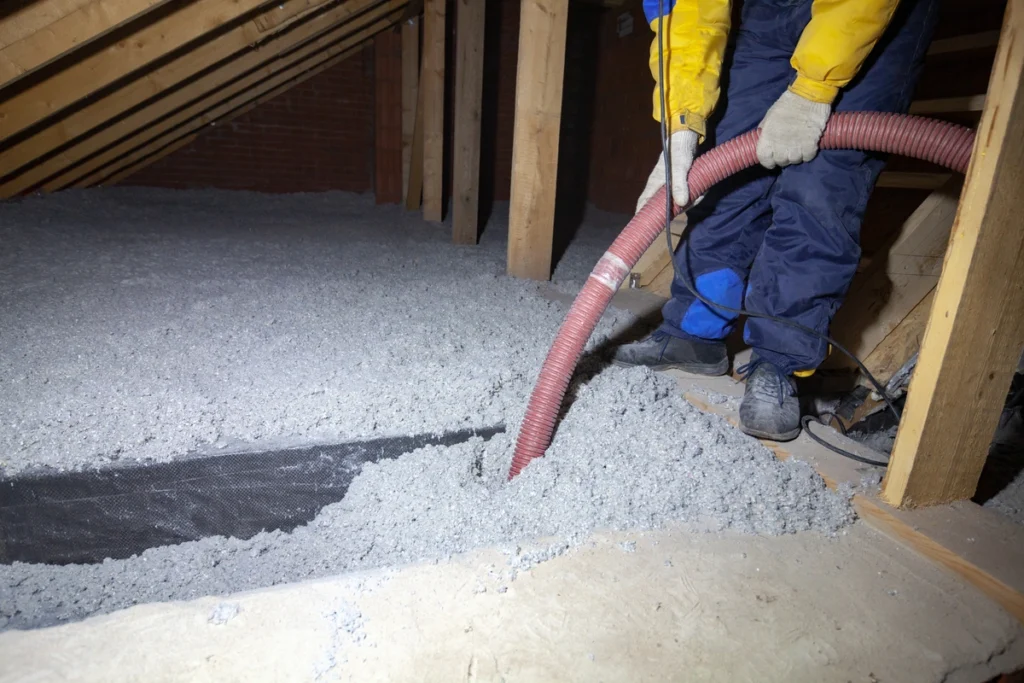
5. Vacuum Loose-Fill Insulation
For loose-fill insulation, use a heavy-duty vacuum to suck up the material. Be sure to empty the vacuum frequently to maintain its efficiency. Loose-fill insulation can be tricky to handle, so take your time and make sure the vacuum’s filter is suited for fine particles to prevent it from clogging.
6. Bag and Seal the Insulation
Place the removed insulation into heavy-duty trash bags and seal them tightly to prevent contamination. Label the bags if necessary, especially if the insulation contains hazardous materials like asbestos. Properly sealed bags will prevent the spread of fibers and keep your workspace clean.
7. Clean the Attic
Once all insulation is removed, vacuum the entire attic space to remove any remaining debris. Pay special attention to corners and crevices where small particles might have settled. Cleaning thoroughly ensures that your attic is ready for new insulation and helps improve air quality in your home.
Following these steps ensures that the insulation removal process is thorough and safe, making it ready for any new insulation installation or other renovations.
🗑️ Disposing of Old Insulation
Proper disposal of old insulation is crucial for environmental and health reasons. Here’s how to do it:
- Check Local Regulations: Some areas have specific guidelines for disposing of insulation. Make sure you comply with these regulations.
- Use Heavy-Duty Bags: Place the insulation in heavy-duty trash bags, seal them tightly, and label them as hazardous material if necessary.
- Contact a Disposal Service: Many waste management companies offer special services for disposing of insulation. Contact them for pick-up or drop-off options.
By disposing of the old insulation responsibly, you help protect the environment and ensure the safety of your household.
🚫 Addressing Common Issues During Removal
Sometimes, unexpected issues can arise during the insulation removal process. Here’s how to handle some common problems:
- Mold and Mildew: If you discover mold or mildew, it’s essential to address the moisture source and clean the affected area before installing new insulation.
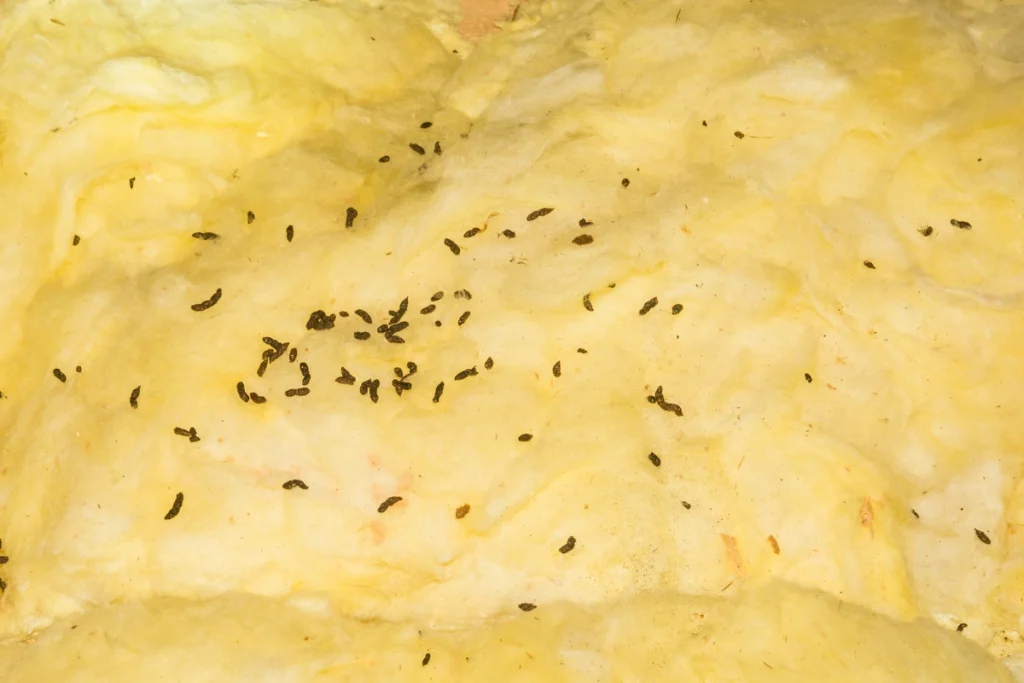
- Pest Infestation: Encountering pests? Remove them safely and seal any entry points to prevent future infestations.
- Damaged Drywall or Roof: If you find structural damage, repair it before proceeding with new insulation installation.
Being prepared to address these issues ensures your new insulation performs optimally.
👨🔧 When to Hire Professionals
While DIY insulation removal is possible, there are situations where hiring professionals is the best option:
- Large Attics: If your attic is extensive, professional help can save you time and effort.
- Severe Contamination: Professional services are better equipped to handle mold, mildew, or pest-infested insulation.
- Lack of Experience: If you’re not confident in your ability to remove insulation safely, it’s best to hire experts.
Professionals bring expertise and specialized equipment to ensure a thorough job.
✋ Preventing Future Insulation Issues
Once you’ve installed new insulation, take these steps to prevent future problems:
- Regular Inspections: Check your attic insulation periodically for signs of damage or moisture.
- Maintain Ventilation: Ensure your attic is well-ventilated to prevent moisture buildup and mold growth.
- Sealing Gaps: Seal any gaps or cracks in your attic to keep pests out and maintain insulation effectiveness.
Regular maintenance helps prolong the life of your insulation and keeps your home comfortable.
🙌 Choose Shingle and Metal Roofs for Your Roofing Needs
At Shingle and Metal Roofs, we understand the importance of a well-insulated home. Our team of experts provides top-notch insulation removal and installation services with a personal touch. We ensure your insulation is installed correctly for maximum efficiency and comfort, backed by industry-leading warranties and easy financing options.
Ready to improve your home’s energy efficiency and comfort? Contact us today to get started with your insulation project. Proper attic insulation is crucial for a comfortable, energy-efficient home. Whether you go the DIY route or hire professionals, the benefits are well worth the effort.
For expert insulation services, trust Shingle and Metal Roofs. We’re here to help every step of the way. Contact us now to schedule a consultation and take the first step toward a better-insulated home.